Introduction
In this blog post I am going to show you how to build the most basic sample application using Cinder.
When setting up the project manually, the most fiddly part is the configuration of our project so it points to the correct libs and include folders and more. But wait, before we dive into this, there is a tool called TinderBox that takes away that burden!
This tool is part of cinders main repository and will setup a skeleton project for us. It will apply all the compiler and linker flags so we can focus on the creative things we want to build.
So let's dive into this.
Check out the latest code base
I assume you are already familiar with git and know how to use it. So let's clone the main branch into a directory of your choice.
git clone --recursive git://github.com/cinder/Cinder.git cinder_master
Create a skeleton project using TinderBox
TinderBox comes pre-compiled and can be found here .\cinder_master\tools\TinderBox-Win\Tinderbox.exe
Fire it up and explore the very simple user-interface. For our example we want to choose the following settings:
Template:         Basic OpenGL
Project Name:     CinderHelloWorld
Location:         C:/Dev/Repos/       // adjust to your needs
Cinder-Version:   cinder_master
Environment:      VC 2015
We are not going to change anything advanced in the settings. Also you can leave Create local git repository unchecked.
The environment is properly selected when it turns to a gray icon
On the next screen TinderBox want's some information regarding the environment options. Just leave the defaults which targets Win32 and uses OpenGL as renderer.
On the following screen we are able to add so called TinderBlocks to our skeleton. This allows to add additional functionality, that otherwise would require manually configuration of the Visual Studio project which is soon to create. Leave this as is for the moment and click on Finish.
There we are. We now have an empty project ready at C:\Dev\Repos\CinderHelloWorld.
The project is configured for static linking, which means when shipping the executable everything will be contained in it. So no further libs will be required at run-time.
One last step is necessary. We need to set the correct Platform Toolset version. Open the C:\Dev\Repos\CinderHelloWorld\vc2015\CinderHelloWorld.sln with Visual Studio 2019. Next right click on the project (not the solution) and select properties. Then use the settings provided below:
General
  Windows SDK Version : 10.0.18362.0
  Platform Toolset    : Visual Studio 2017 (v141)

C/C++
  Code Generation
    Enable Minimal Rebuild : No (/GM-)
Have a look at this article on how to get Visual Studio ready with this specific toolset.
By setting /GM- we get rid of the following warning which may be irritating: Command line warning D9035: option 'Gm' has been deprecated and will be removed in a future release
Create your first application
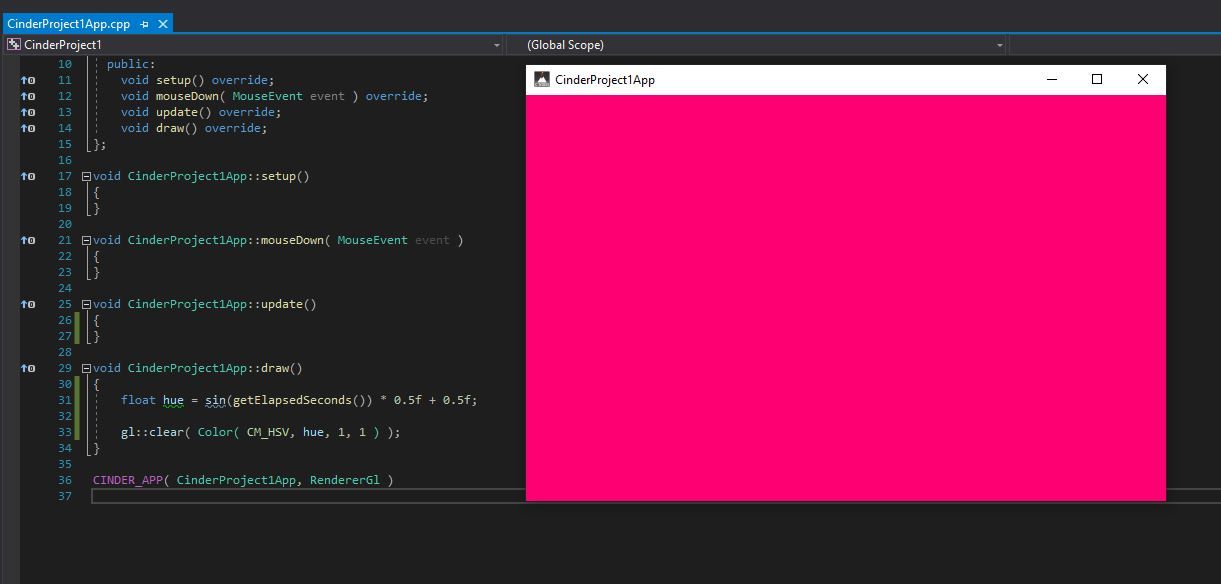
In Visual Studio open CinderHelloWorld.cpp and replace the content of draw() with the following two lines:
float hue = sin(getElapsedSeconds()) * 0.5f + 0.5f;

gl::clear( Color( CM_HSV, hue, 1, 1 ) );
When you compile and run the code you should see a window with oscilating colors. That's it for the moment. You can find further documentation in the offical Cinder Documentation.